Tips
Notifications | Comments & Files | Shortcuts / Keyboard Shortcuts | Labels (Tags) vs Custom Fields | Combine Excel Exports | Smart Filter | The Global SearchNotifications
Almost everywhere on the detail page > Comments
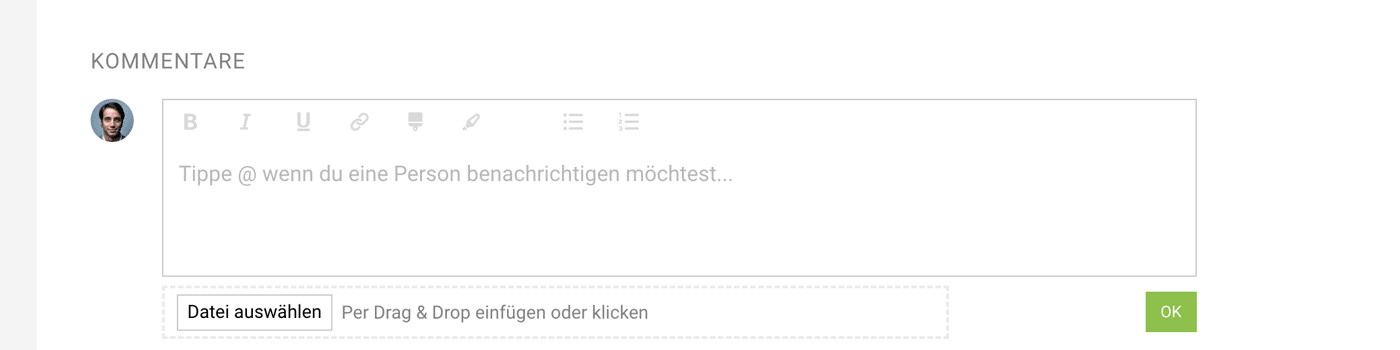
The @mention feature will be familiar to most people who use Trello, Slack, Twitter, or WhatsApp groups. It lets you notify people easily and specifically.
If you type @M... under "Notes & Files", you will be shown a list of all colleagues whose names start with "M". So, for example, select @MiaMaier and add a message: "@MiaMaier Please create a quote for the lead here". Mia will then receive a notification with this request and can either reply or take action straight away.
 (English image not yet available)
Examples of Use
Purchases
→ Get confirmation from the PM that the invoice is correct.
→ Ask which project the supplier invoice should be assigned to.
→ Get confirmation from the PM that the invoice is correct.
→ Ask which project the supplier invoice should be assigned to.
Quotes or Invoices
→ Get approval to send.
→Notify someone about an overdue invoice.
Sales
→ Communicate information/status more quickly.
→ Ask someone to create or update a quote.
→ Communicate information/status more quickly.
→ Ask someone to create or update a quote.
Contacts
→ Ask someone to update the details.
Comments & Files
Almost everywhere on the detail page > Comments (see above)
 (English image not yet available)
(English image not yet available)History
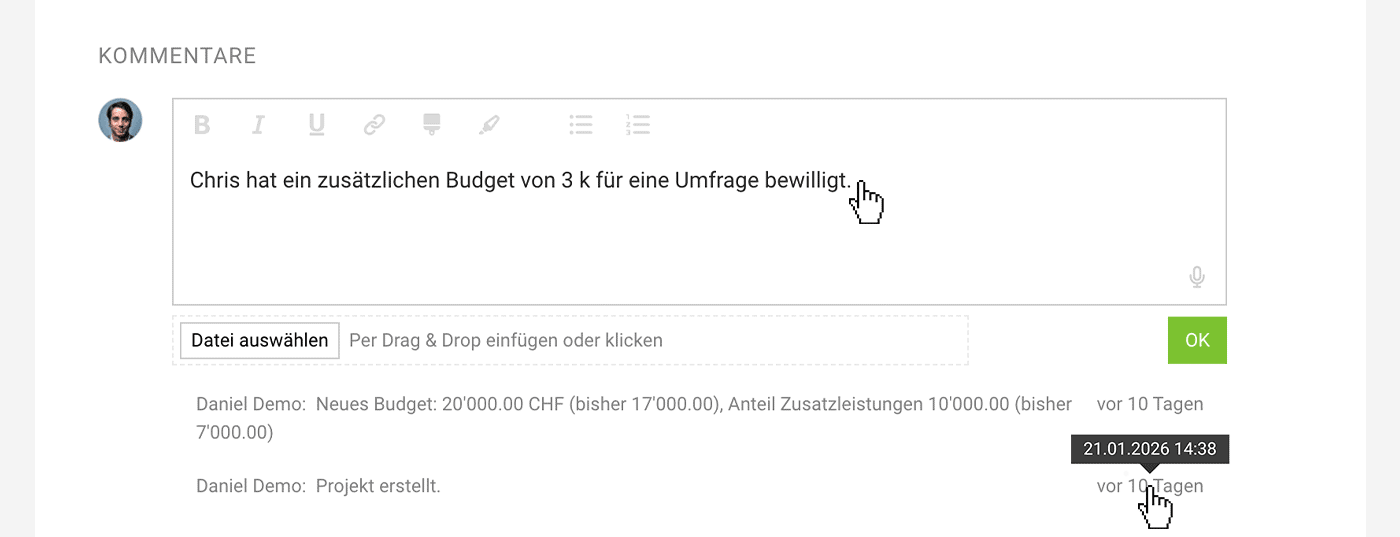
On the detail page for a client, project, invoice, etc., there is a section at the bottom of the page called "Comments". This is where you can capture supporting material and your own notes. MOCO also automatically shows events for traceability here, for example budget adjustments, status changes, texts, and information about email sending.
Change Log
The change log lets you track all changes made to a record. This documentation is available for invoices and quotes, as well as for leads, projects, companies, contacts, purchases, and individual people under Staff.
The central change log also provides an overview of all changes from the last few weeks.
The central change log also provides an overview of all changes from the last few weeks.
Files
File upload is intended for supporting material such as a contract or a briefing, and can, for example, be used as a personnel file for staff. For quick access, files are listed directly at the top alongside the detail information in some places.
Voice Input
Voice input helps you capture comments more quickly. It is available on all pages with a comments section. As this is an AI feature, it must be enabled under Account > AI.
Shortcuts / Keyboard Shortcuts
General
- Open Search – /
(usually = Shift + 7) Search is often the quickest way to get where you need to be, especially if you want to open a person, a project, or a client directly.
Lists
- Show Only My Items – Q
In lists, Q filters to your own projects, leads, contacts, clients, and purchases. It also applies to purchase approvals and leave requests. - Open Filters – F
Press F to show or hide the filter panel in the main lists. In the archive, the filter is expanded by default. - Variables in Intro and Closing Text – {
Open and insert
Time Tracking
- Start Voice Input – M
Starts voice input in time tracking, provided the opt-in in Settings has been enabled. - Show Suggestions – B
- Copy Entry – Drag + ALT/OPT
This lets you quickly copy an entry from yesterday to today, and adjust it if needed. - Click the plus or minus button + ALT/OPT
Rounds time in 5-minute increments (instead of 15-minute increments). - Ctrl/Cmd + Shift + K
Open the time tracking window: if you install the browser extension, you can track your time using this shortcut from any browser tab. You may need to configure this shortcut in your browser.
Working Time Tracking
- Alt/Opt + Enter (or Cmd + Enter on macOS)
Auto-Fill with Project Time - Control minute or quarter-hour increments: minutes with +/- and quarter-hours with Up/Down
Quotes & Invoices
- Copy Line Item – Drag + ALT/OPT
You can move line items using drag and drop. If you hold down ALT/OPT while doing so, the item is copied instead and inserted where you want it.
Notifications
- Go to Inbox – Shift + W
Open or close the notifications panel.
Planning
- Filter by Project –
ALT/OPT + click an entry
or click the selected project favourite
See Reduce View to One Project - Show Only My Planning – Q
Reduces the view to your own planning and also switches to zoom mode. - Copy entries or individual sequence instances – ALT/OPT + drag
Projects
- Enter a number of hours and an "h",
to enter budgets in hours (an hourly rate must be stored in the project).
Comments
- Start Voice Input – M
Starts voice input in time tracking, provided the opt-in in Settings has been enabled.
Labels (Tags) vs Custom Fields
How Labels Help — and How They Compare with Custom Fields
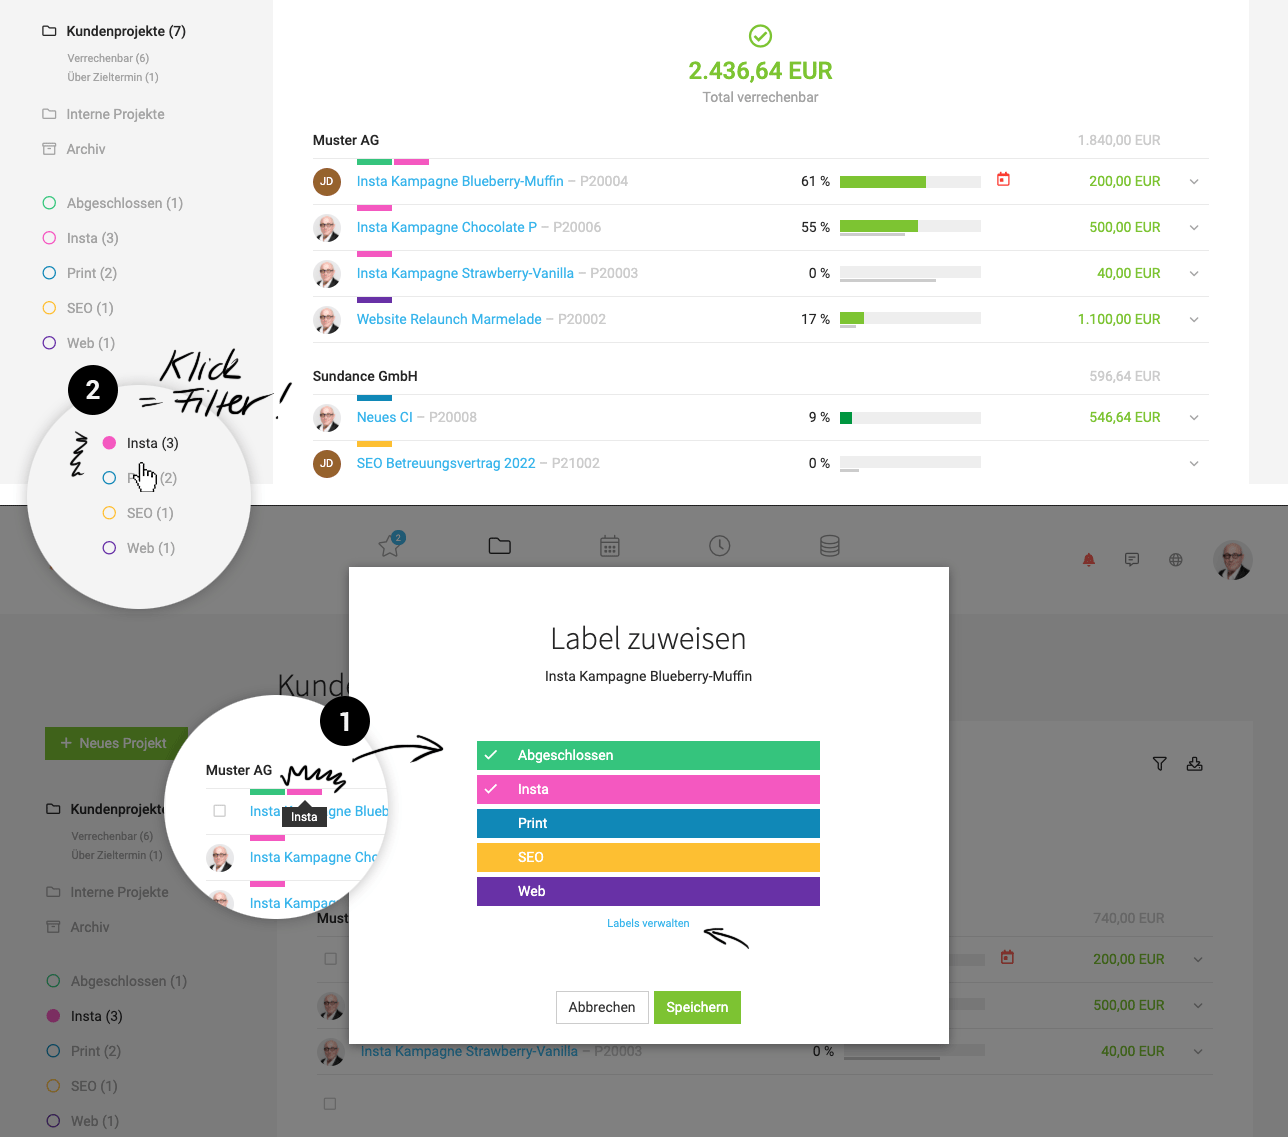
Labels are useful for temporary marking or categorising. You can filter by labels in lists (2) and reports.
Custom fields are used to extend your master data with additional, tailored information. Entries can also be found via search (magnifying glass or Shift +7) (example: find a person by their BahnCard number). Depending on the field type, you can display them on the quote/invoice in the info block (example: PO number). For the “Date” field type, you can set up a notification (example: client contract end date).
Custom fields are also available directly for quotes and invoices. And for additional services, too.
Custom fields are used to extend your master data with additional, tailored information. Entries can also be found via search (magnifying glass or Shift +7) (example: find a person by their BahnCard number). Depending on the field type, you can display them on the quote/invoice in the info block (example: PO number). For the “Date” field type, you can set up a notification (example: client contract end date).
Custom fields are also available directly for quotes and invoices. And for additional services, too.
What they have in common: both labels and custom fields are included in Excel exports, making them useful for further processing and for additional, bespoke analyses.
 (English image not yet available)
(English image not yet available)Modal mit Label-Zuweisung nach Klick auf den kleinen grauen Balken in der Zeile. Im Beispiel sind bereits alle Objekte gelabelt
Create & Assign Labels
In the list, click the small light-grey bar above the name to create or assign a label. A coloured bar will then appear with information about the label that has been set (1). Click it again to change the labels.
Alternatively, you can assign the label directly in the object’s detail view at the top left.
Label Multiple Objects at Once
In some areas, you can select objects on the left and choose a shared label at the bottom right.
Alternatively, you can assign the label directly in the object’s detail view at the top left.
Label Multiple Objects at Once
In some areas, you can select objects on the left and choose a shared label at the bottom right.
Combine Excel Exports
With the XLOOKUP, you can combine or link data from Excel exports.
Thomas shows you how to do this in the video here:
 (English image not yet available)
Find this and more Excel tips here
Thomas shows you how to do this in the video here:
(English image not yet available)Find this and more Excel tips here
Smart Filter
Quick Overview, Get Important Tasks Done
In MOCO, the so-called "Smart Filters" are integrated across all areas. They highlight projects with specific characteristics in the client project list, such as over budget, past the target date, billable, or without a billing plan. Clicking on the Smart Filter (visually a sub-navigation point) then filters specifically by this characteristic.
MOCO uses these characteristics to indicate where action is required. Typically, this means some action is necessary. Completing the task automatically reduces the number displayed in the Smart Filter.
A Smart Filter only appears when the characteristic is present.
Once everything is completed, the Smart Filter disappears.
Notification
You can also choose to receive notifications about these matters.
Smart Filter "Without Label"
If you use labels and your goal is for all items in a list to be labelled, you can enable the "Without Label" Smart Filter in the settings for the desired areas.
MOCO uses these characteristics to indicate where action is required. Typically, this means some action is necessary. Completing the task automatically reduces the number displayed in the Smart Filter.
A Smart Filter only appears when the characteristic is present.
Once everything is completed, the Smart Filter disappears.
Notification
You can also choose to receive notifications about these matters.
Smart Filter "Without Label"
If you use labels and your goal is for all items in a list to be labelled, you can enable the "Without Label" Smart Filter in the settings for the desired areas.
The Global Search
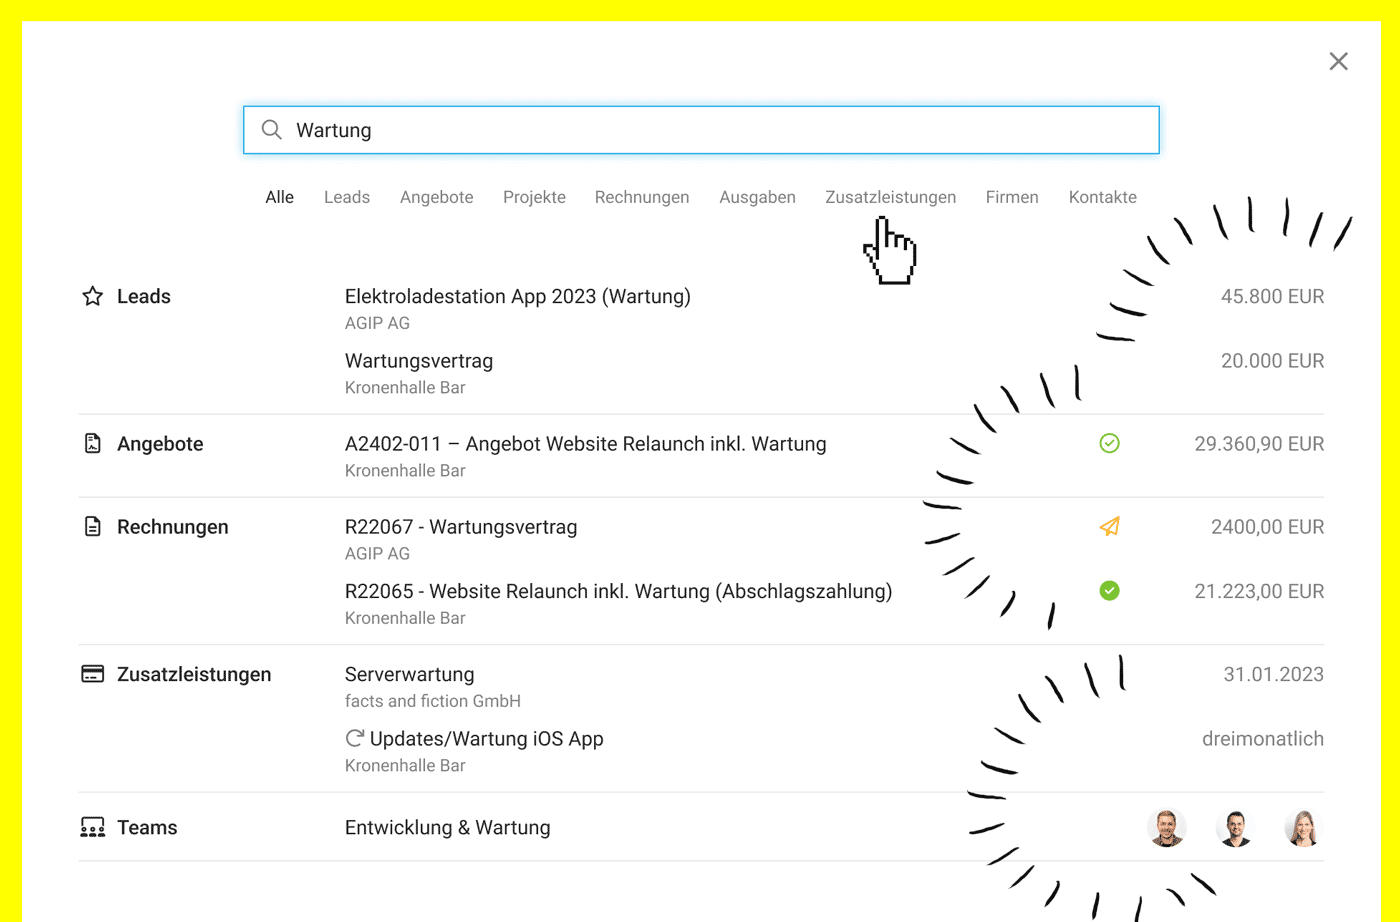
Access: Magnifying glass top right or keyboard shortcut "/ " (Shift + 7)
With the global search, you can quickly jump to the desired client, contact, invoice, etc. – or find suppliers, people, etc. using custom fields.
 (English image not yet available)
With the global search, you can quickly jump to the desired client, contact, invoice, etc. – or find suppliers, people, etc. using custom fields.
(English image not yet available)Search via Custom Fields — Example Use Case
You categorize your suppliers with a custom "Multiple Choice" field by industry or material: Litho, Printing, Services, etc. In the search, you can then enter "Printing" and all printing companies will be displayed.
Further example on Personnel & Skills for a more detailed description of custom fields and their benefits.
Further example on Personnel & Skills for a more detailed description of custom fields and their benefits.