Security
User Roles | Two-Factor Authentication | Single Sign-On | Change Log | Deleted DocumentsUser Roles
Settings > Security > User Roles
Define Roles for Access Rights
 (English image not yet available)
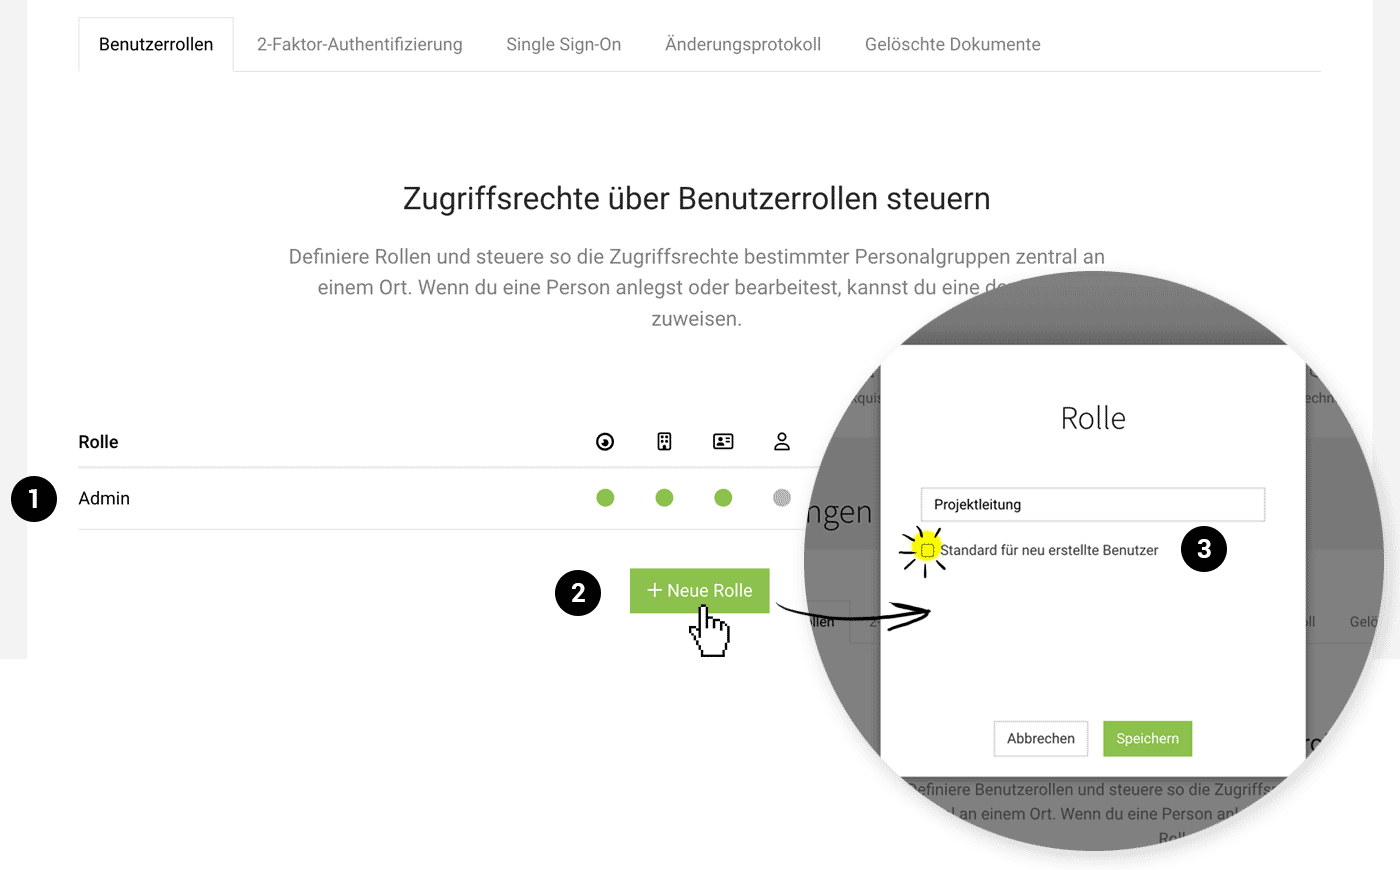
Role "Admin" (1)
A role named "Admin" is already created. It can be assigned to the account holder and others (with default rights to personnel and settings). The name and access rights can be customised.
Define Additional Roles
You can define as many roles as needed via "+ New Role" (2). Assign access rights for each area by clicking on the circles in the list.
Default for Newly Created Users
New users only have access rights to time tracking. If you wish to set a different default, select the checkbox "Default for newly created users" (3) for a role.
Account Holder & Security
The account holder is selected in the settings under "Account". For security reasons, only they can:
- grant access to reports and settings
- delete the account
Two-Factor Authentication
Settings > Security > Two-Factor Authentication
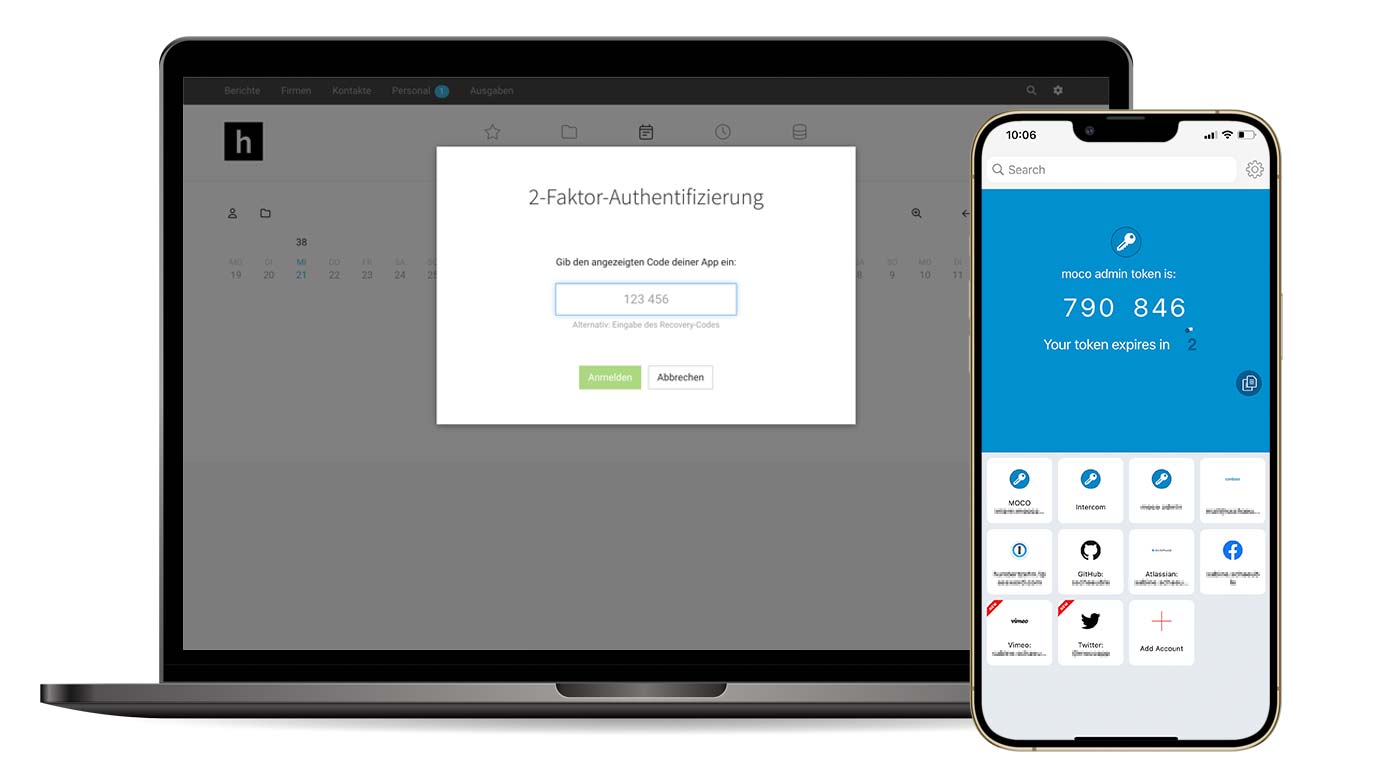
Additional Security Layer for Login
Two-Factor Authentication (2FA) provides an extra layer of security. It ensures that only the respective user can access their account and sensitive data, even if someone else knows their personal password. To access sensitive areas* within MOCO, users are required to enter a code. This code is available on the user's smartphone via an app and changes every 30 seconds.
Prerequisite: Each user must have an authentication mobile app (e.g., Authy, Google Authenticator, or Microsoft Authenticator, other apps are also possible) installed on their smartphone. Using this app, they add the MOCO account by scanning the initially displayed QR code.
Prerequisite: Each user must have an authentication mobile app (e.g., Authy, Google Authenticator, or Microsoft Authenticator, other apps are also possible) installed on their smartphone. Using this app, they add the MOCO account by scanning the initially displayed QR code.
Activating 2FA
- First, each user must install an authentication mobile app like Authy or Google Authenticator on their smartphone.
- Activate 2FA in the settings under "Account" > "2FA" for the entire account.
- After activation, all users must add the MOCO account to the installed authentication app by scanning the displayed QR code once.
Once logged in, you will be asked for the verification code every 24 hours. If you prefer a different interval, just contact us - we are happy to adjust it individually.
 (English image not yet available)
Switching to a new smartphone or authenticator app or other issues:
2FA Troubleshooting
(English image not yet available)*Sensible Bereiche sind alle Bereiche ausser "Zeiterfassung" und das eigene Profil. Diese sind von der 2FA ausgenommen und weiterhin wie gewohnt und ohne zusätzlichen Code verfügbar.
Switching to a new smartphone or authenticator app or other issues:
2FA Troubleshooting
Single Sign-On
Settings > Security > Single Sign-On
Login via Google, M365 or Okta
With Single Sign-On (SSO) using providers like Google, Microsoft Office 365, or Okta (SAML protocol), all users can log in securely and conveniently with just one click. As an alternative to 2FA, SSO offers excellent security and control for user management in MOCO.
Setup and Activation
In the settings under "Security" > "Single Sign-On", you can begin the setup and complete the following steps:
 (English image not yet available)
(English image not yet available)1. Upload your Identity Provider's Configuration XML
You can either enter the .xml URL directly or upload the .xml file yourself.
2. Retrieve MOCO's Configuration XML
You can now access the configuration XML provided by MOCO with all metadata via URL or download it as a file. Please extract the necessary information from it or, if possible, directly provide the link/file to your Identity Provider.
You can now access the configuration XML provided by MOCO with all metadata via URL or download it as a file. Please extract the necessary information from it or, if possible, directly provide the link/file to your Identity Provider.
3. Activate Single Sign-On
Once the configuration is in place, you can activate SSO using the green button. Log out of MOCO and test the new login method.
Once the configuration is in place, you can activate SSO using the green button. Log out of MOCO and test the new login method.
Find valuable tips for setup in our help article. Contact our support if you encounter any issues.
Notes
- SSO replaces Two-Factor Authentication
Disable 2FA if it is currently enabled. - Disable login with email and password
If users should log in exclusively via SSO, email and password login can be disabled. - Automatically create new users in MOCO upon first SSO login
By default, with SSO enabled, new users in MOCO are only created when they log in for the first time via SSO. This option can be disabled if needed, so users must be manually created in MOCO before they can log in via SSO.
Costs
SSO is included in MOCO Unlimited and can be added to MOCO Pro (2 EUR/CHF per user per month; max. 200 EUR/CHF per month).
More about MOCO plans
More about MOCO plans
Change Log
Settings > Security > Change Log
All significant changes and comments on proposals, projects, invoices, etc., are now centrally accessible. Additionally, other critical activities within the account are systematically recorded.
 (English image not yet available)
The list can be filtered by areas (What?), people (Who?), and time period (When?), or searched specifically by keywords using the free text field. If needed, entries can be exported in XLSX format.
Among others, the following changes are documented:
- All comments/notes that you can otherwise view on individual objects are gathered here
- Deleted objects – e.g., proposals, invoices, absences, accounting exports, companies and contacts, API keys
- Changed settings – e.g., change of account owner, access rights, bank account, period lock
- User switch
Changes from the past 30 days (MOCO Pro) or 180 days (MOCO Unlimited) are accessible.
Deleted Documents
Settings > Security > Deleted Documents
Here you can find documents and files that have been deleted in MOCO.
You can download the files individually or in bulk (1). Regardless, you can always find deleted invoices including the deletion comment via the global search.
 (English image not yet available)
Documents are accessible for the past 30 days (MOCO Pro) or 180 days (MOCO Unlimited).
(English image not yet available)Documents are accessible for the past 30 days (MOCO Pro) or 180 days (MOCO Unlimited).