Account
General | AI (Beta) | Custom Fields | Number Ranges | Email (Sending) | Email (Signature) | Smart Filter | To-dosGeneral
The settings can be found under the gear icon at the top right.
Settings > Account > General
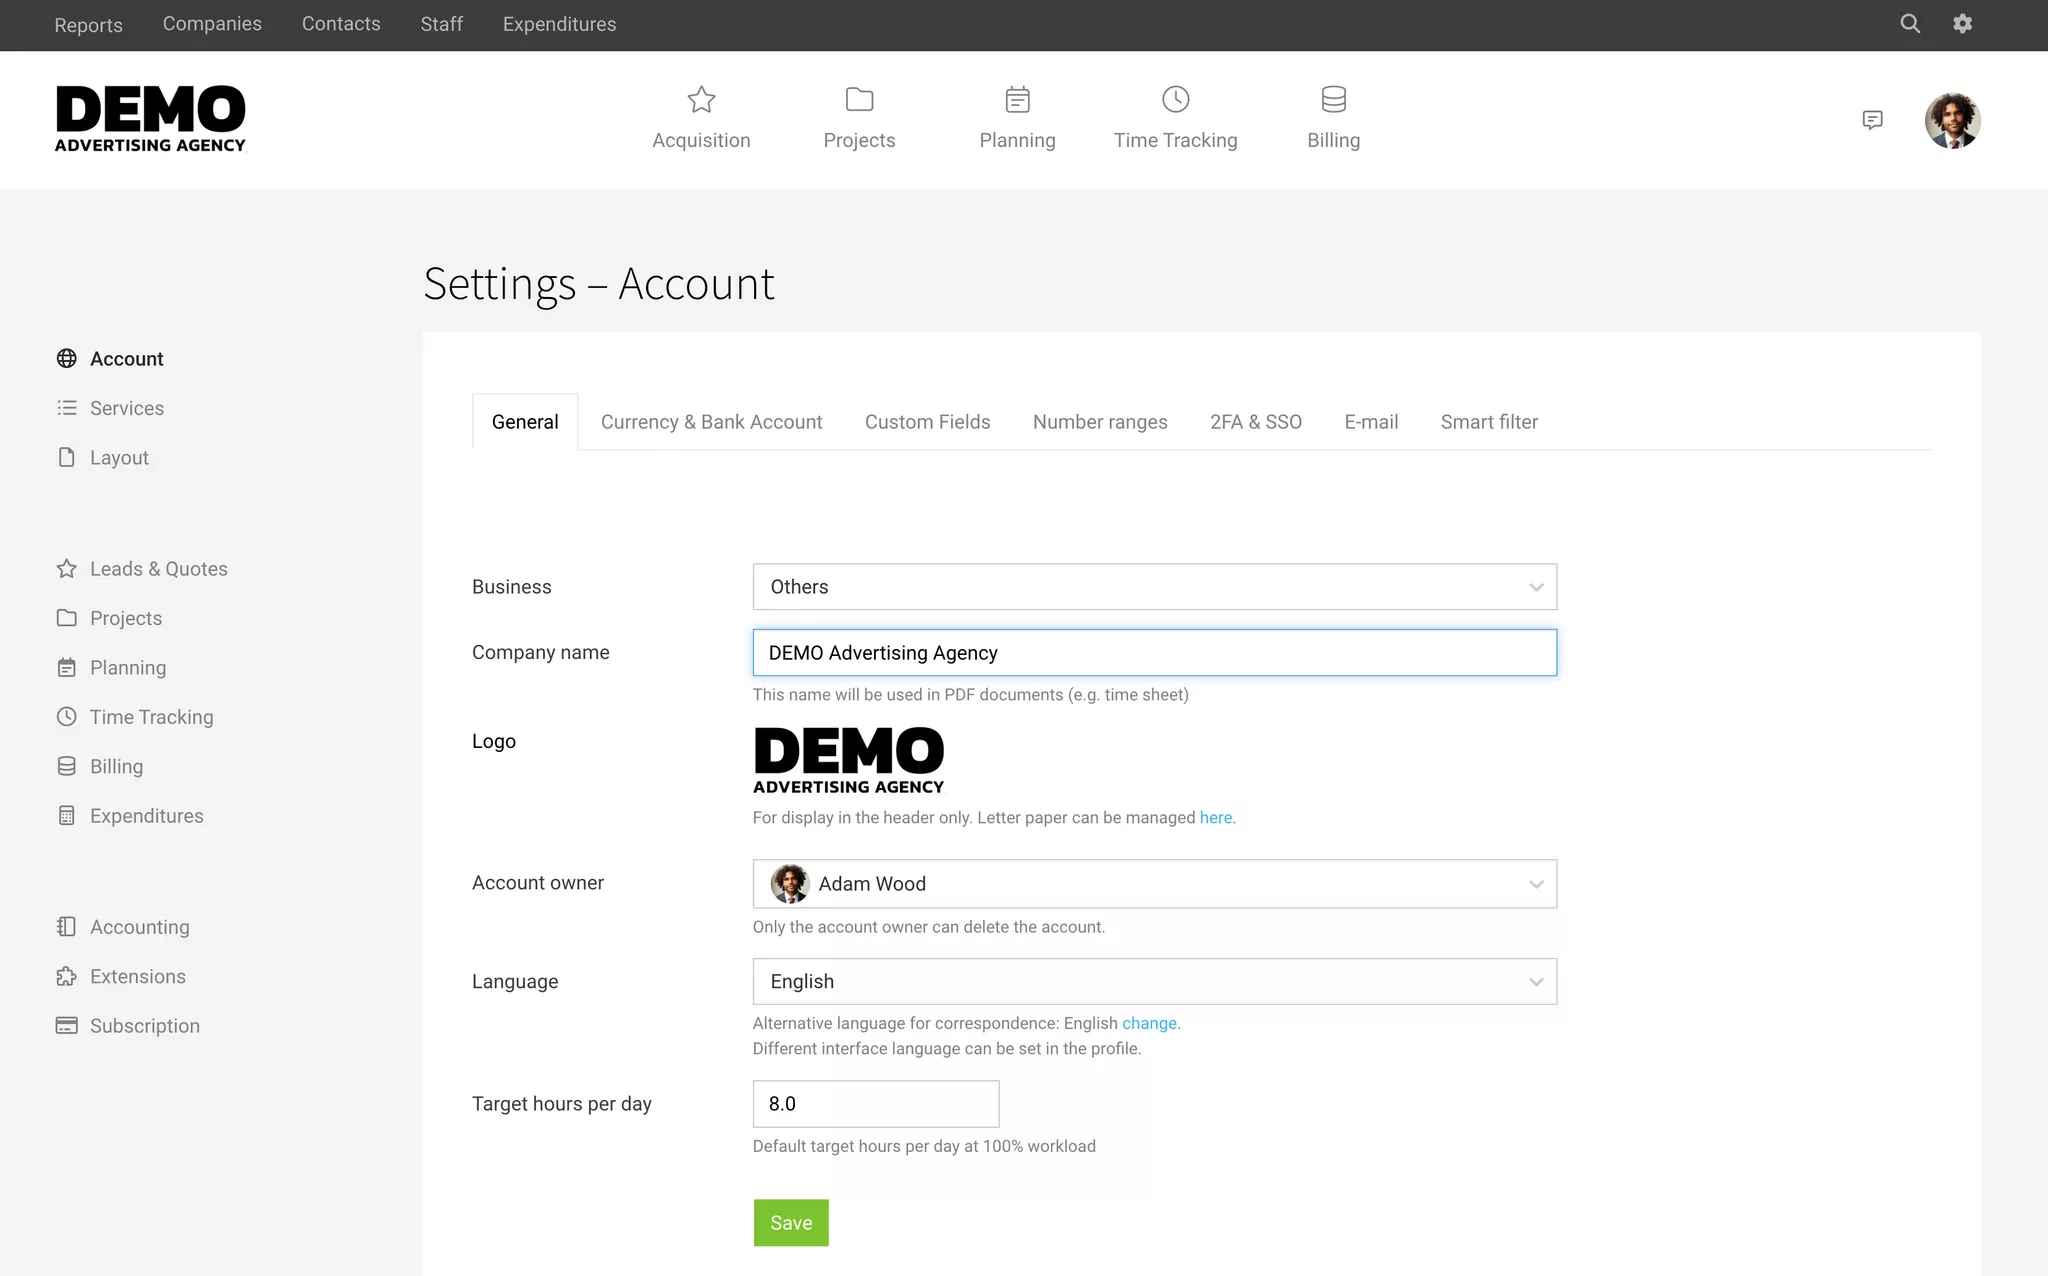
In "General," you can manage general settings such as:
Settings > Account > General
In "General," you can manage general settings such as:
- Company name
- Logo – for display only in the user interface » Invoice layout
- Account holder
- Language Learn more about languages for the user interface and client correspondence
- Base hours per day (Regular working hours per day at a 100% workload)
AI (Beta)
Settings > Account > AI
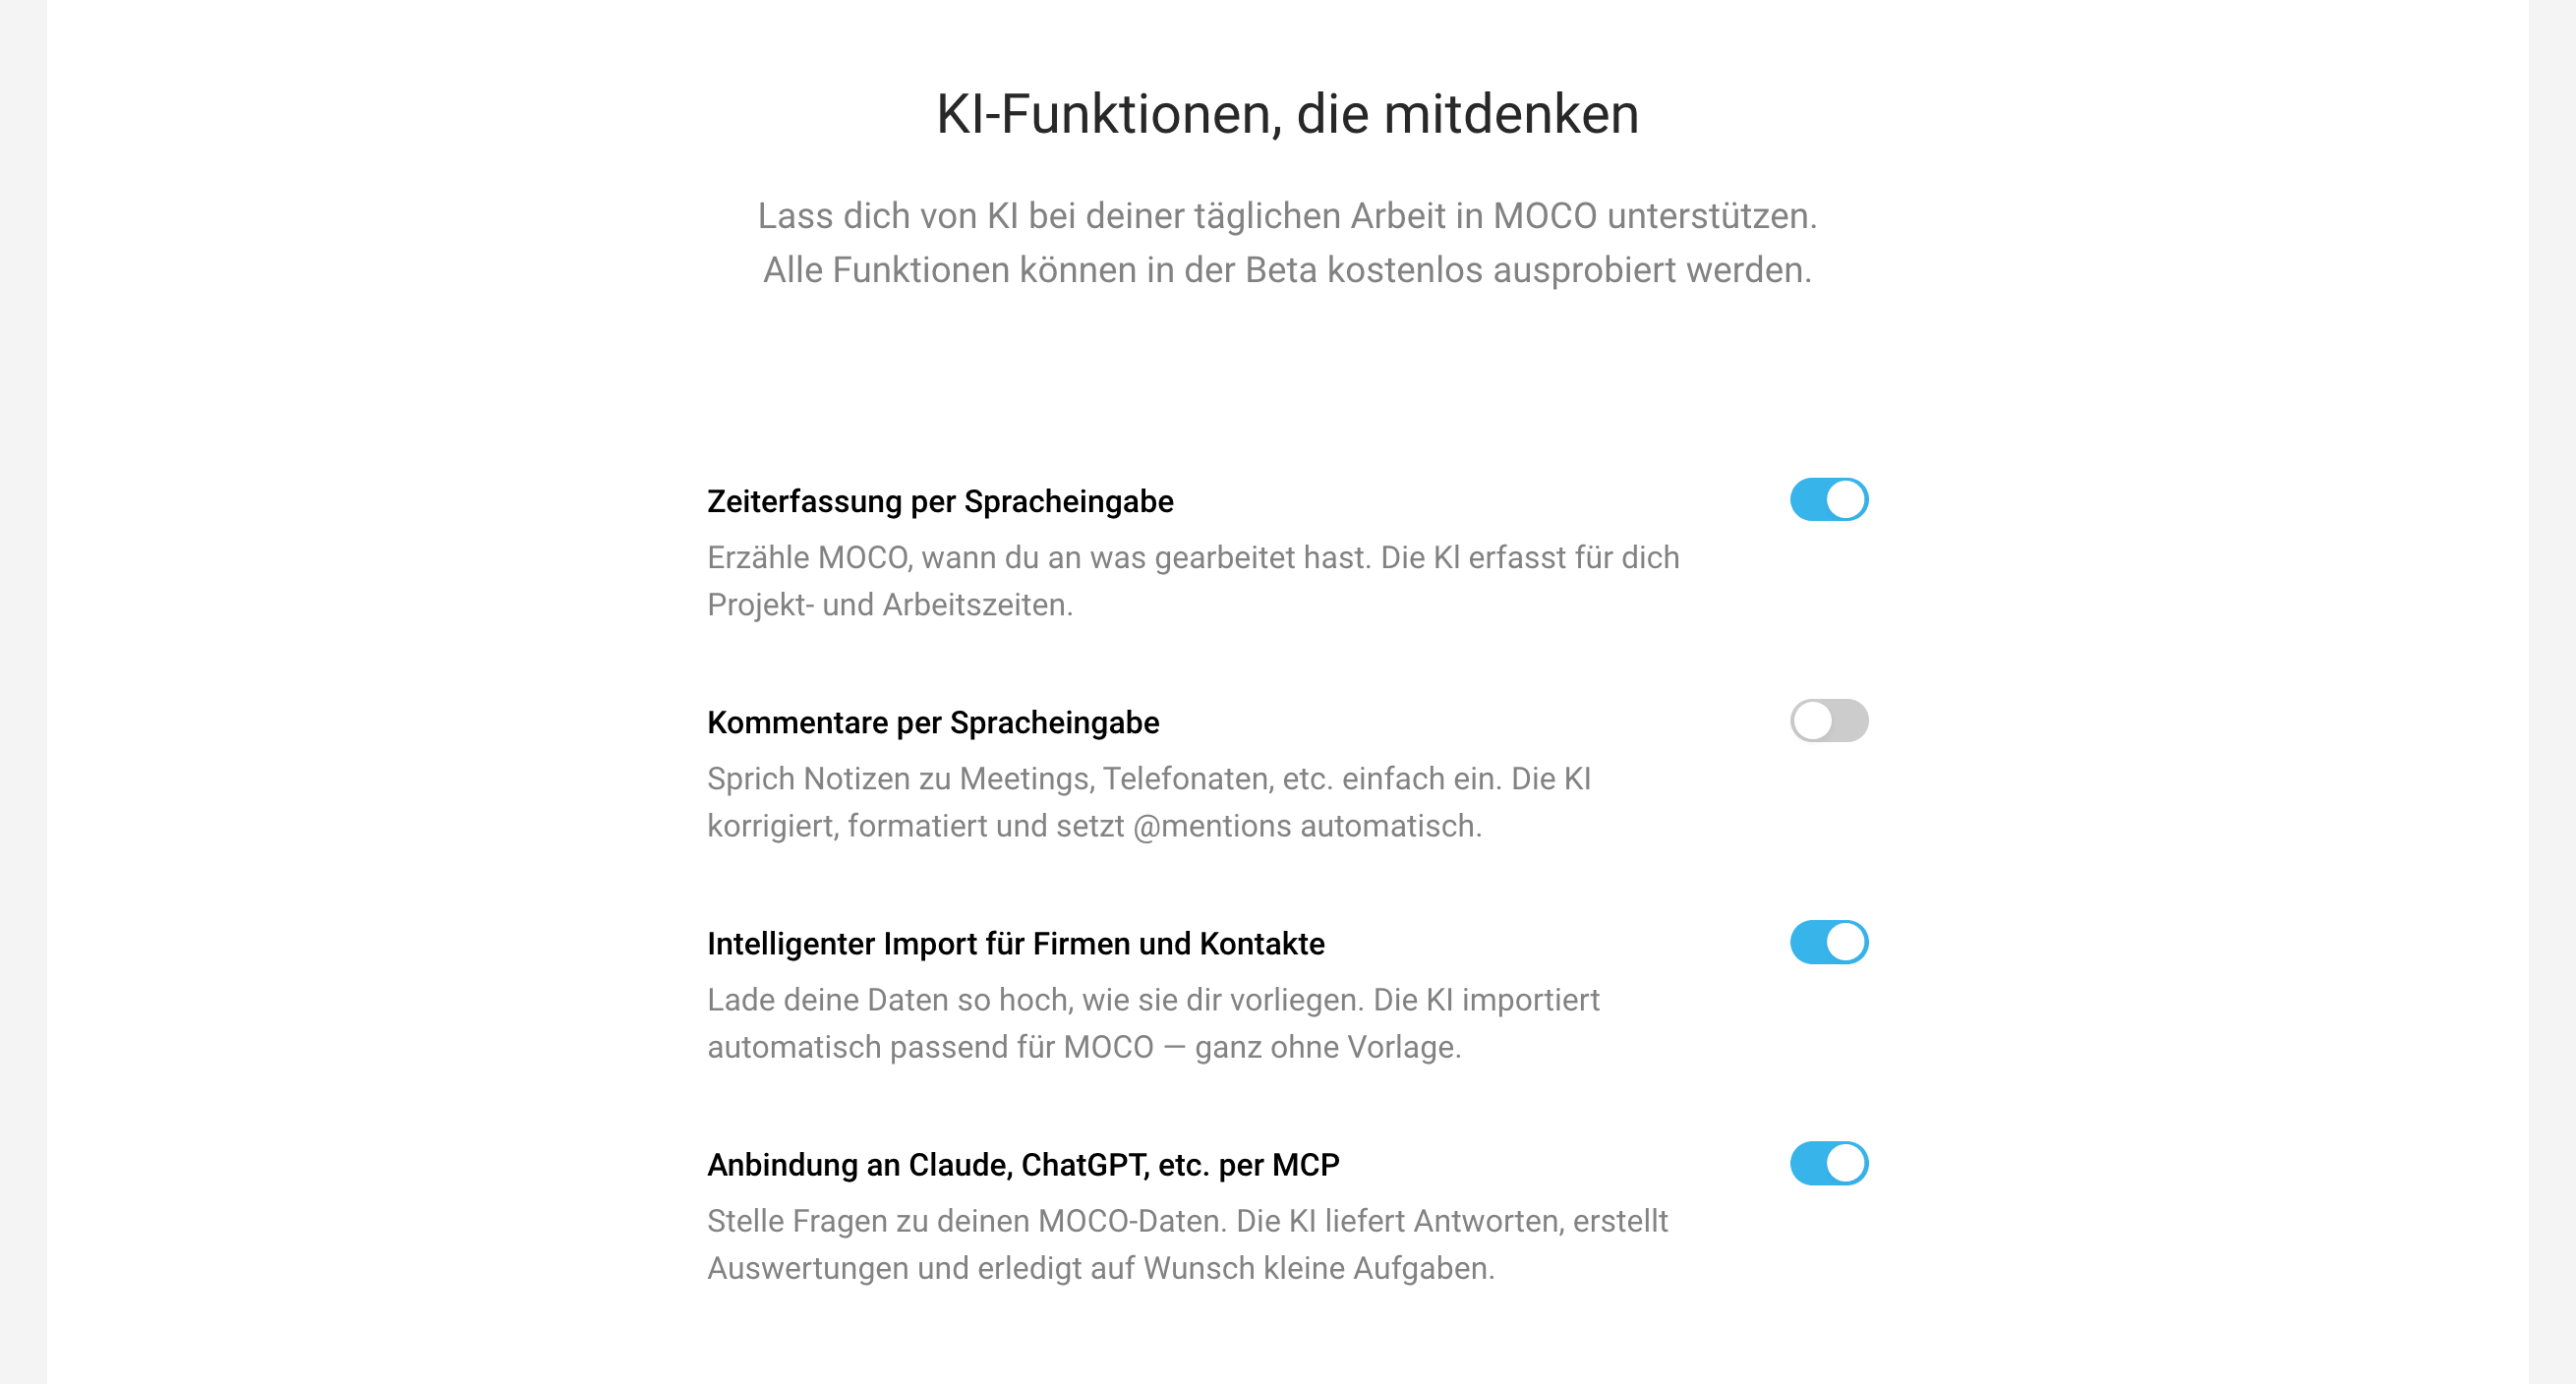
All AI features are optional (opt-in). You decide whether and how you use them. During the beta phase, you can try the new features free of charge.
 (English image not yet available)
All AI features are optional (opt-in). You decide whether and how you use them. During the beta phase, you can try the new features free of charge.
(English image not yet available)Time Tracking by Voice Input
In time tracking in the browser, or on your iPhone, you can use voice input to dictate information for individual time entries – or your entire working day. The AI analyses what you say, creates project time entries, and records your working time.
Comments by Voice Input
Voice input is available on all pages with a comments section. For example, after a sales call or a client call, simply dictate the key information. The AI processes your input and creates an error-free comment for you.
Smart Import for Companies & Contacts
The AI import option lets you import existing data easily – without having to adapt it to the Excel file template.
Integration with ChatGPT and Claude (MCP)
Enable the connection in the settings in ChatGPT or Claude. Your LLM can then access MOCO data and, in line with your access rights, provide information, create reports, and make changes.
Custom Fields
Settings > Account > Custom Fields
Client, project, contact, invoice data, and more can be extended with custom fields to suit your needs.
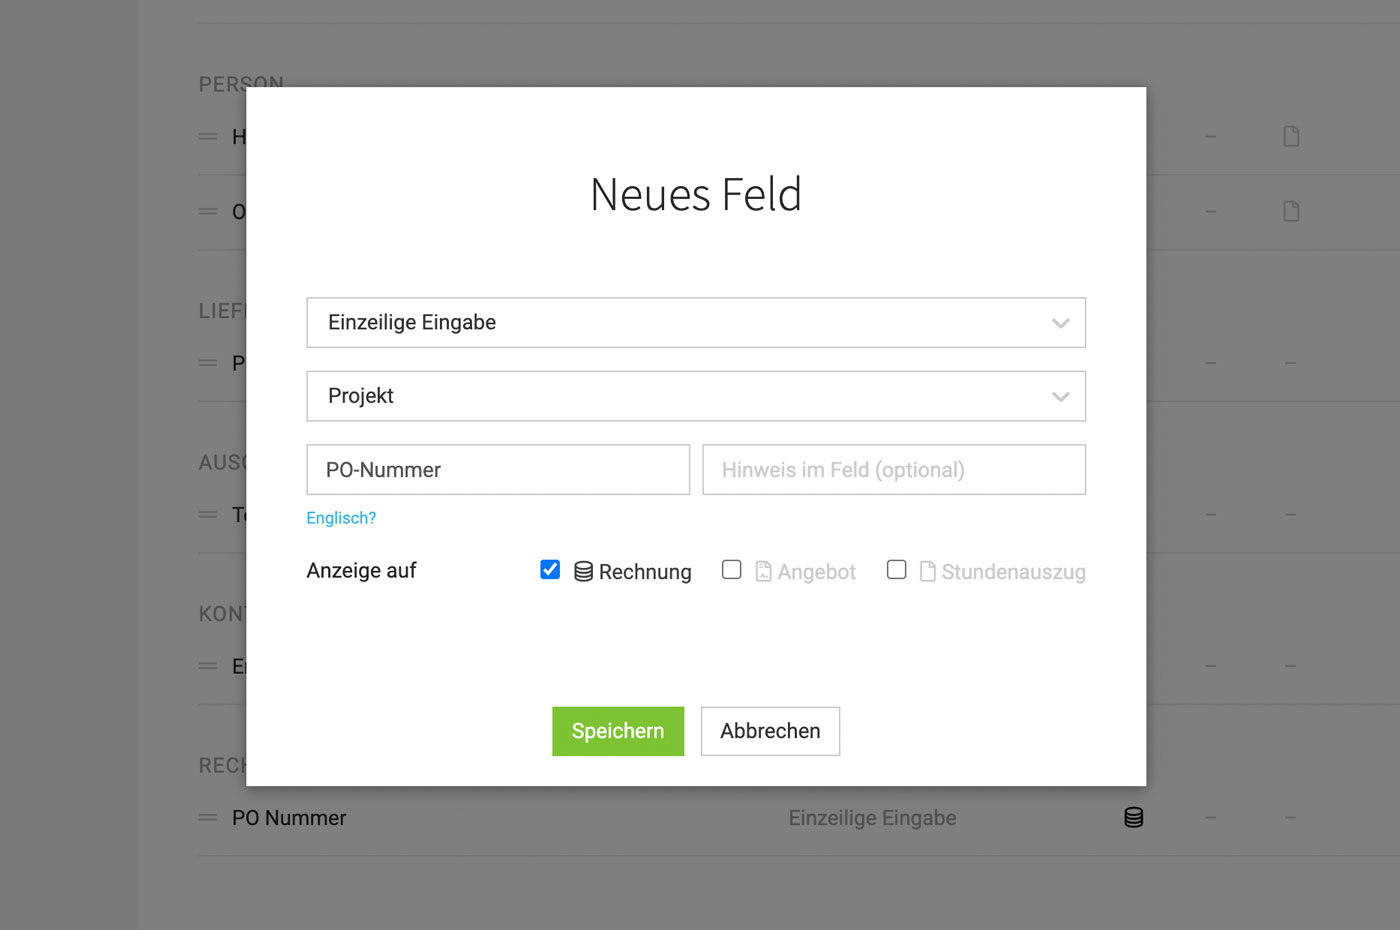
You define these in Settings (the cogwheel at the top right next to Search) under "Account" > "Custom Fields". The custom field then appears as an additional form field.
 (English image not yet available)
Field types include single-line input, multi-line input, link, yes/no, single select, multi-select, and date. Adding help text lets you guide what should be entered. If needed, you can also add labels for an alternative language.
Adding data, reporting, display on invoices
Alongside their main purpose of adding extra data (e.g. for staff: date of the next performance review; for a project: purchase order number), custom fields also offer the following benefits:
Optional display on quote, invoice, timesheet
Custom fields can be shown in the info block on quotes, invoices, and timesheets. Data at client, project, and invoice level is only shown if the field was completed before saving the quote or invoice.
Reports
Custom fields are also included in Excel exports, giving you additional reporting options.
Use for targeted search
Data entered via custom fields is searchable. For example, you can quickly find people with specific skills: create a custom field called "Skills" with multi-select for Staff/Person. Using the global search (magnifying glass at the top right – or Shift + 7), entering a value will list all matching people.
» Compare with using labels
» Use custom fields for cost centres
Optional display on quote, invoice, timesheet
Custom fields can be shown in the info block on quotes, invoices, and timesheets. Data at client, project, and invoice level is only shown if the field was completed before saving the quote or invoice.
Reports
Custom fields are also included in Excel exports, giving you additional reporting options.
Use for targeted search
Data entered via custom fields is searchable. For example, you can quickly find people with specific skills: create a custom field called "Skills" with multi-select for Staff/Person. Using the global search (magnifying glass at the top right – or Shift + 7), entering a value will list all matching people.
» Compare with using labels
» Use custom fields for cost centres
Fields You Can Enable Directly
MOCO includes several fields that you can enable if needed. They can be used consistently and, once activated, are available in the relevant areas.
- External Project Number (BT-11)
As a service provider, you enter an external project number if a client wants this as a project reference for their internal allocation. - Contract Number (BT-12)
As a service provider, you can also provide a contract number at your client’s request. - Purchase Order Number (BT-13)
As a service provider, you include a purchase order number (also known as a PO number) on the invoice if a client uses internal "purchase orders".
Relevant for e-invoices
The fields you can enable are included in e-invoices as structured information.
Choose the label
For fields you can enable, you can use a different label if needed – if that better fits how you work or your existing terminology.
Use in projects, quotes, and invoices
The activated fields are available in the project and can also be used in quotes and invoices. If a value has already been recorded in the project, it will be carried over to project-related documents. If needed, you can overwrite the value in the relevant document.
For documents without a clear project reference
For documents without a clear project reference – for example, at client level or across multiple projects – MOCO cannot prefill a single, unambiguous value. In these cases, add the value directly in the relevant document.
Number Ranges
Settings > Account > Number Ranges
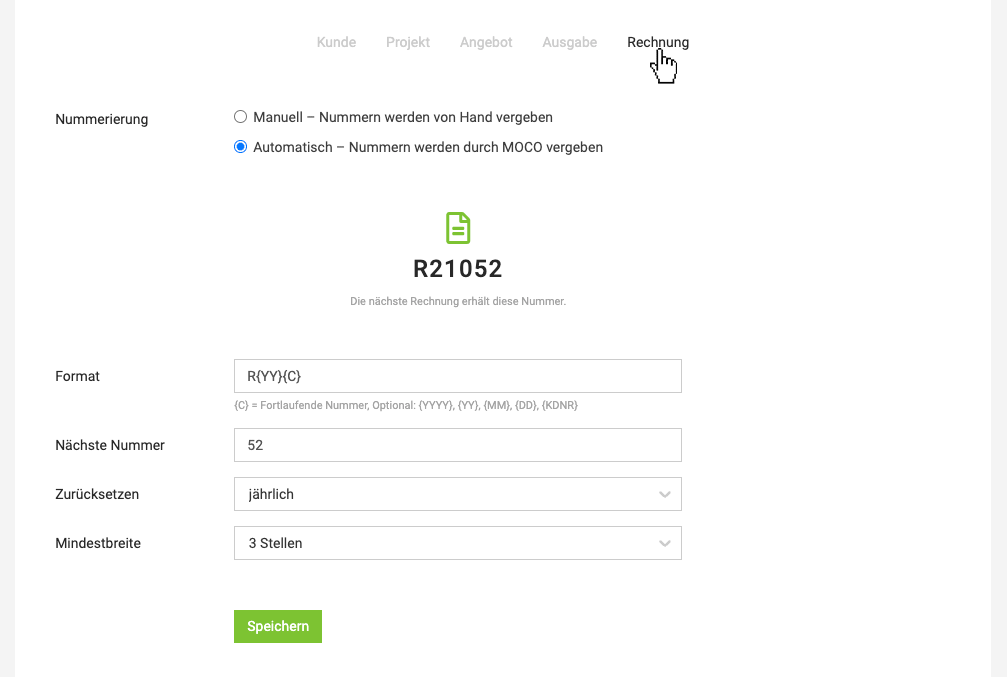
Here you define whether the numbers for clients, projects, quotes, invoices, and purchases are managed manually or assigned automatically based on your settings.
 (English image not yet available)
Automatic Numbering
You can define the format and start or continue numbering from a specific number.
Tips for Choosing an Invoice Number Range
You can define the format and start or continue numbering from a specific number.
Tips for Choosing an Invoice Number Range
Invoice Number Requirement (DE – AT – CH)
In Germany, § 14(4) sentence 1 no. 4 UStG requires consecutive invoice numbering. The consecutive number (invoice number) is intended to ensure that each invoice issued by a business is unique. However, a gapless sequence of invoice numbers is not mandatory, according to the VAT Application Decree
see also http://www.akademie.de/wissen/fortlaufende-rechnungsnummer
In Austria, the VAT Act also requires a unique invoice number for clear identification.
In Switzerland, from a tax perspective, invoices do not need a number. See the article on the SME Portal of the Swiss Confederation.
In Germany, § 14(4) sentence 1 no. 4 UStG requires consecutive invoice numbering. The consecutive number (invoice number) is intended to ensure that each invoice issued by a business is unique. However, a gapless sequence of invoice numbers is not mandatory, according to the VAT Application Decree
see also http://www.akademie.de/wissen/fortlaufende-rechnungsnummer
In Austria, the VAT Act also requires a unique invoice number for clear identification.
In Switzerland, from a tax perspective, invoices do not need a number. See the article on the SME Portal of the Swiss Confederation.
Email (Sending)
Settings > Account > Email
Here you can configure various settings for sending emails: delivery method, email addresses, display name, reply-to addresses, BCC, and signature logo.
 (English image not yet available)
Sending via MOCO
By default, MOCO sends Quotes and Invoices via the MOCO server. The benefit: you do not need to set anything up. You can choose the display name, BCC, reply-to email address, etc. The sender email address shown will be noreply@mocoapp.com.
Sending via Your Own Domain
As an alternative to sending via MOCO, you can also send emails via your own domain, i.e. using the user email addresses stored in MOCO. To do this, you verify your domain once.
Set Up Your Domain
Setup requires access to your domain management. You will need to copy across the details shown by MOCO. After verification, Quotes and Invoices can be sent directly from the user email addresses (as recorded in MOCO). These must use the verified domain; otherwise, the standard email address will be used as a fallback for sending. More information
MOCO logs email sending. If you would like to receive a copy in your email client, use the BCC option.
Set Up Your Domain
Setup requires access to your domain management. You will need to copy across the details shown by MOCO. After verification, Quotes and Invoices can be sent directly from the user email addresses (as recorded in MOCO). These must use the verified domain; otherwise, the standard email address will be used as a fallback for sending. More information
MOCO logs email sending. If you would like to receive a copy in your email client, use the BCC option.
Other Settings
Sender Display Name
By default, the recipient will see the sender’s name as the sender. Alternatively, you can display the company name as the sender.
Reply-To Address
If the recipient clicks "Reply", the reply will be sent directly to the individual sender’s email address. Alternatively, you can set a single, shared reply-to email address.
BCC Address
If needed, you can also predefine one or more BCC addresses (these can be removed again in the sending dialogue for individual cases).
Email (Signature)
Settings > Account > Email
Save an Image (Logo) for Sending Emails
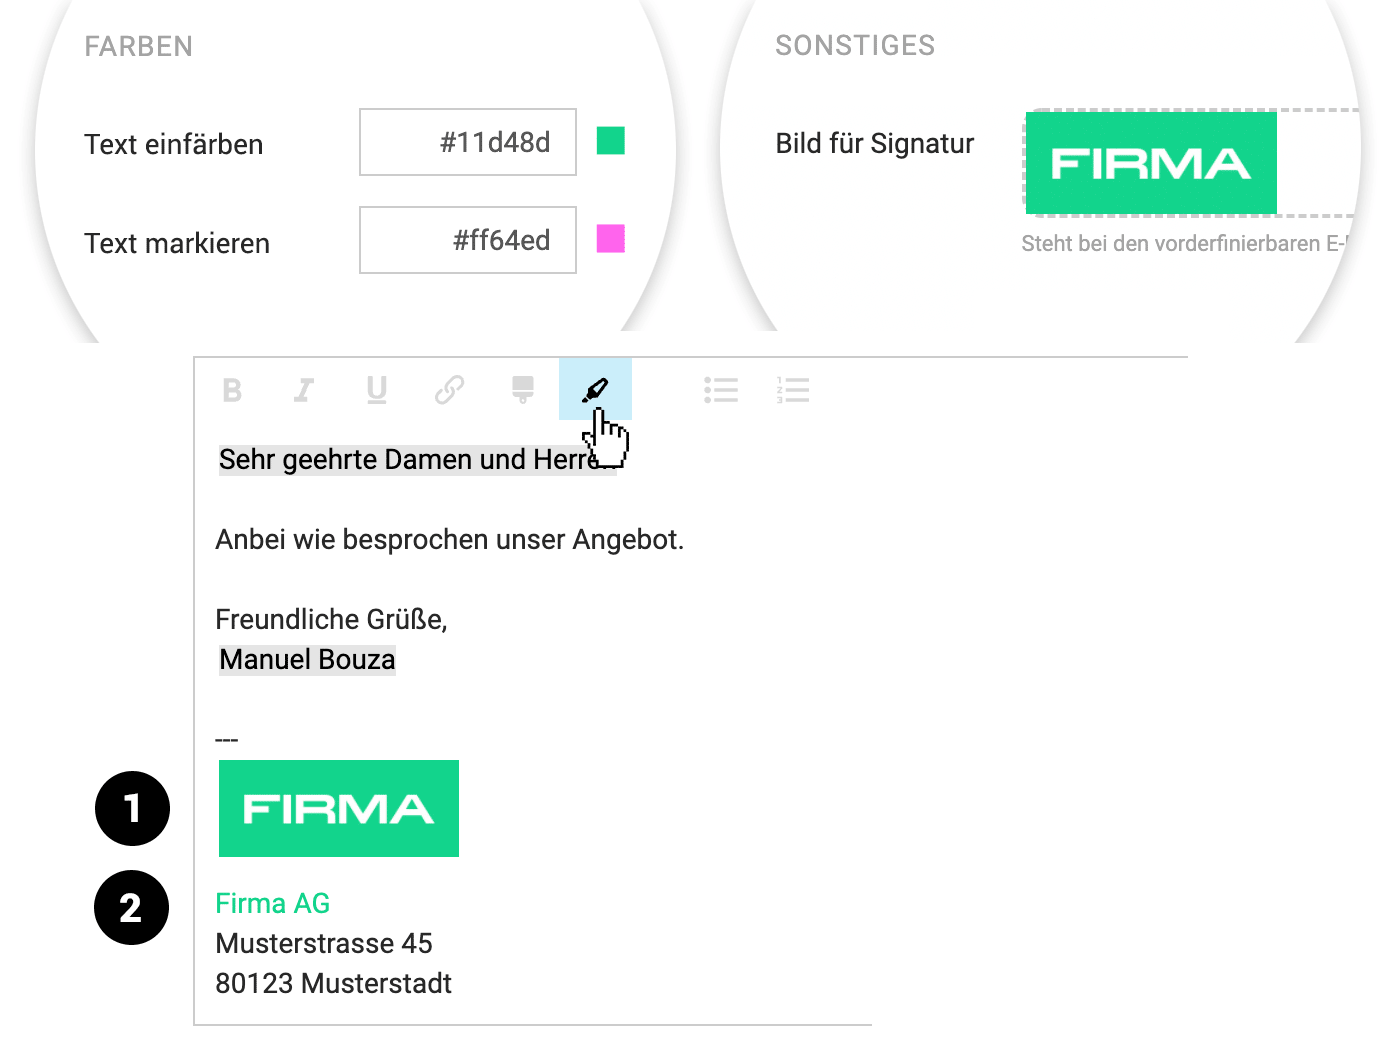
If you want to use an image in your signature, save it in the email settings. You can then insert it into the various standard email texts using the variables (type { ) (1).
 (English image not yet available)
(English image not yet available)Define Standard Email Text & Signature
- You define the standard email texts incl. signature (usually sender details such as company address and contact details) in Settings in the relevant section for Quotes and Invoices.
- For personalisation, use the variables (available via the curly bracket "{").
- You can also colour text or add a link (2) The colours are based on the values defined under "Layout" > "General".
Smart Filter
Settings > Account > Smart Filter
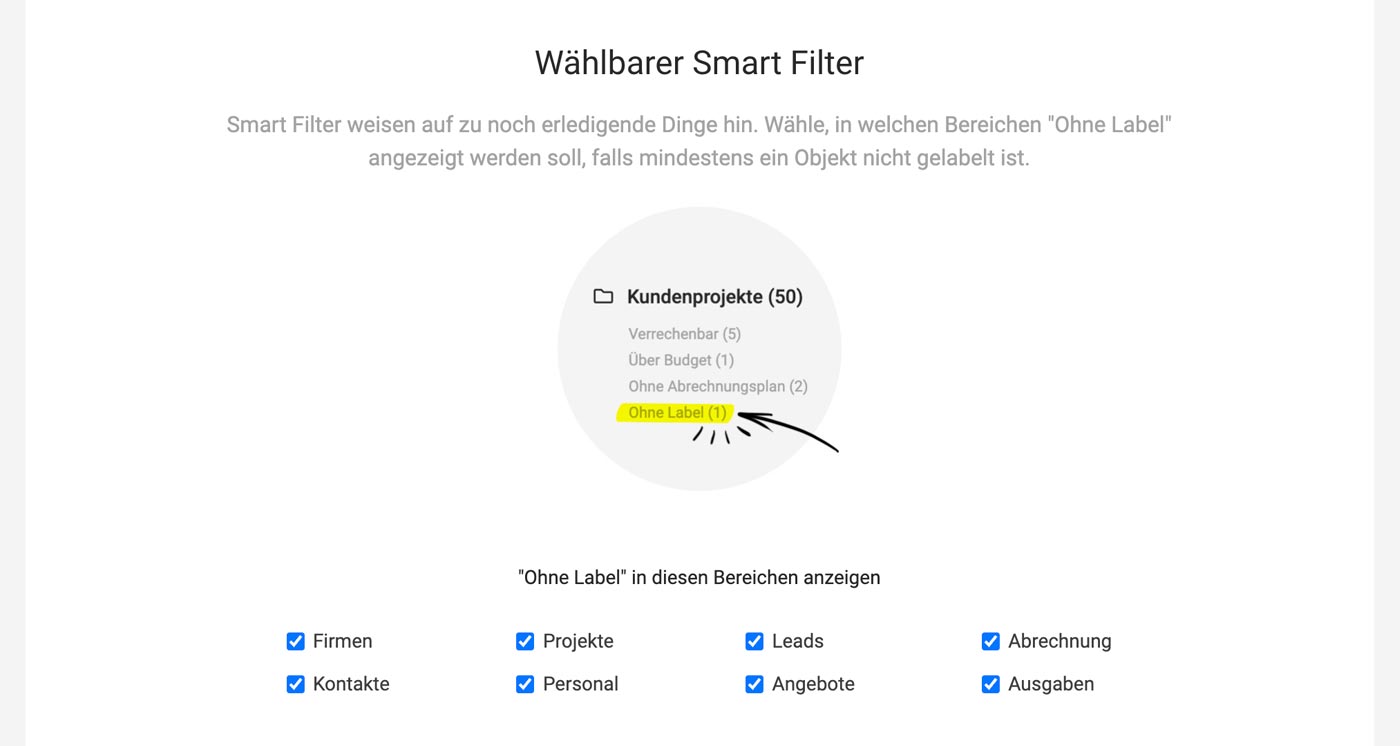 (English image not yet available)
Select the “No Label” Smart Filter
If you want a prompt in various areas when items have not been labelled, you can enable the “No Label” Smart Filter under Settings > Account > Smart Filter. This lets you filter specifically for relevant projects, invoices, etc.
What Are Smart Filters?
Smart Filters are targeted filter options designed to help you get things done.
(English image not yet available)Select the “No Label” Smart Filter
If you want a prompt in various areas when items have not been labelled, you can enable the “No Label” Smart Filter under Settings > Account > Smart Filter. This lets you filter specifically for relevant projects, invoices, etc.
What Are Smart Filters?
Smart Filters are targeted filter options designed to help you get things done.
For example, for projects: Over budget, Past target date, Billable, Has no billing plan.
To-dos
Settings > Account > To-dos
Here you can enable or disable the use of to-dos for specific areas. To-dos are distinct from task management & collaboration as they primarily have an administrative nature.
More about to-dos
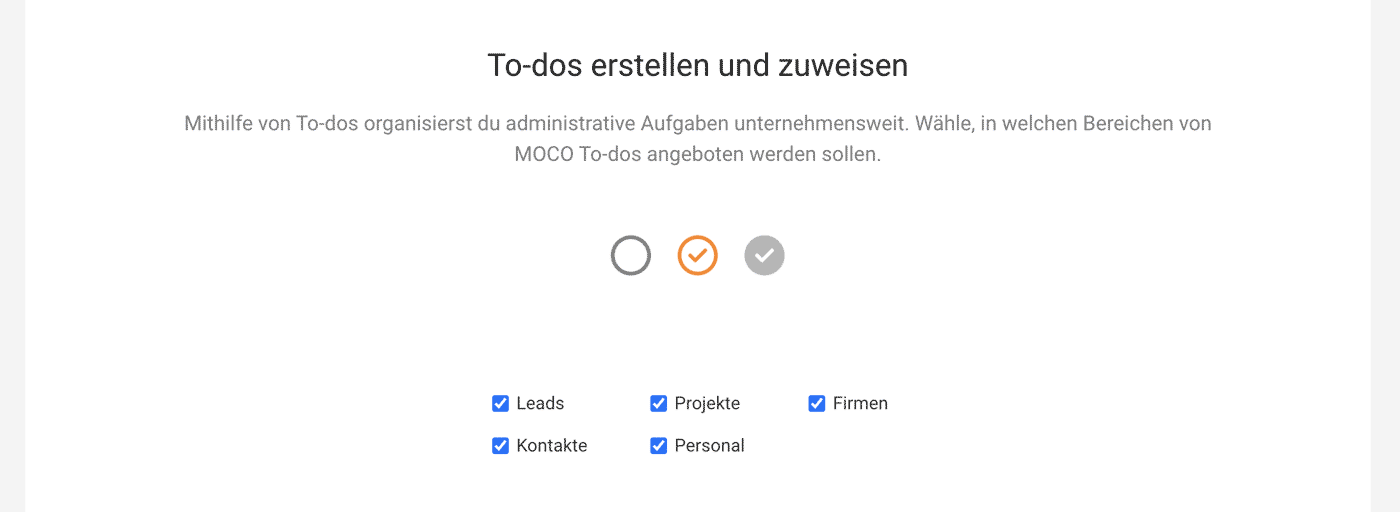 (English image not yet available)
Here you can enable or disable the use of to-dos for specific areas. To-dos are distinct from task management & collaboration as they primarily have an administrative nature.
More about to-dos
(English image not yet available)